


AWM-BT monitor mounts for ultrawide displays installation guide
The AWMS-BT40 Installation Guide PDF is the official product setup reference developed by Atdec R&D. We recommend you read it prior to installation of your mount.
BT solutions installation video highlights
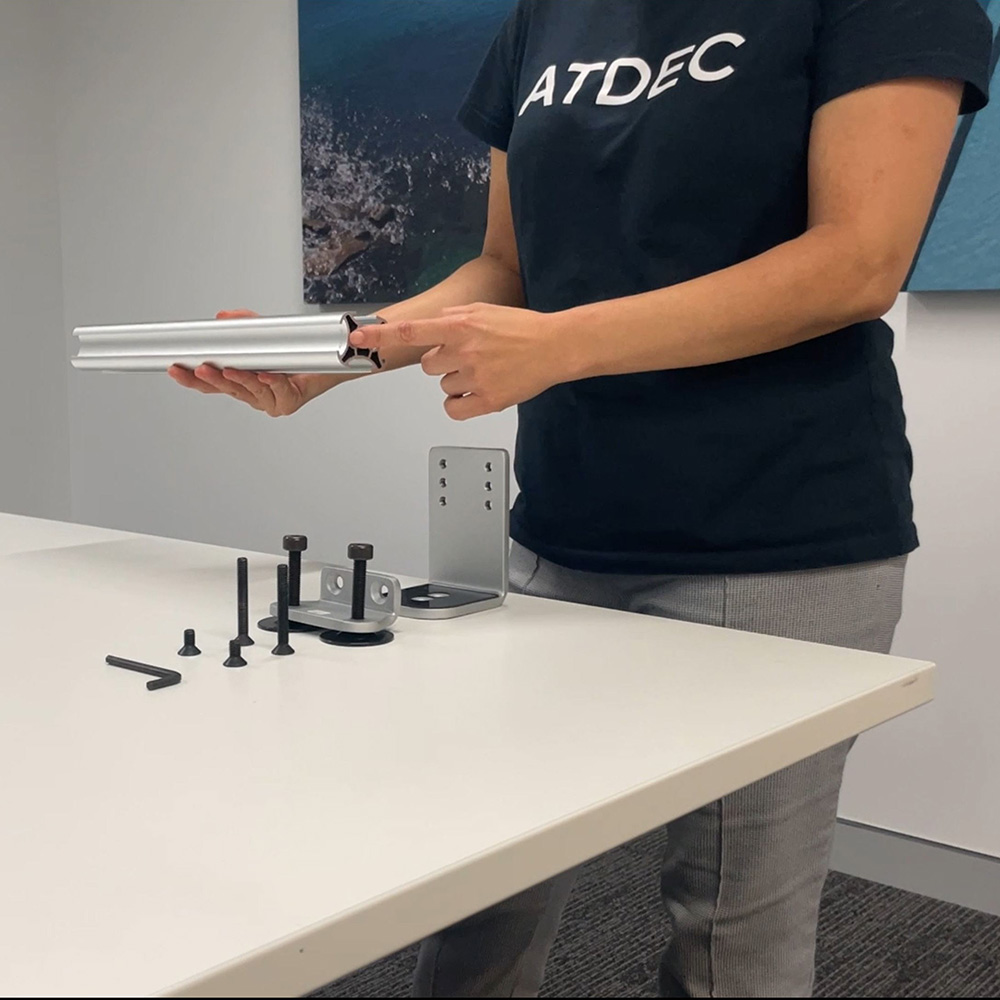
Attach your clamp to the post and secure it to the desk as per the instruction manual. Clamp, grommet, and bolt through fixings each have an installation guide.
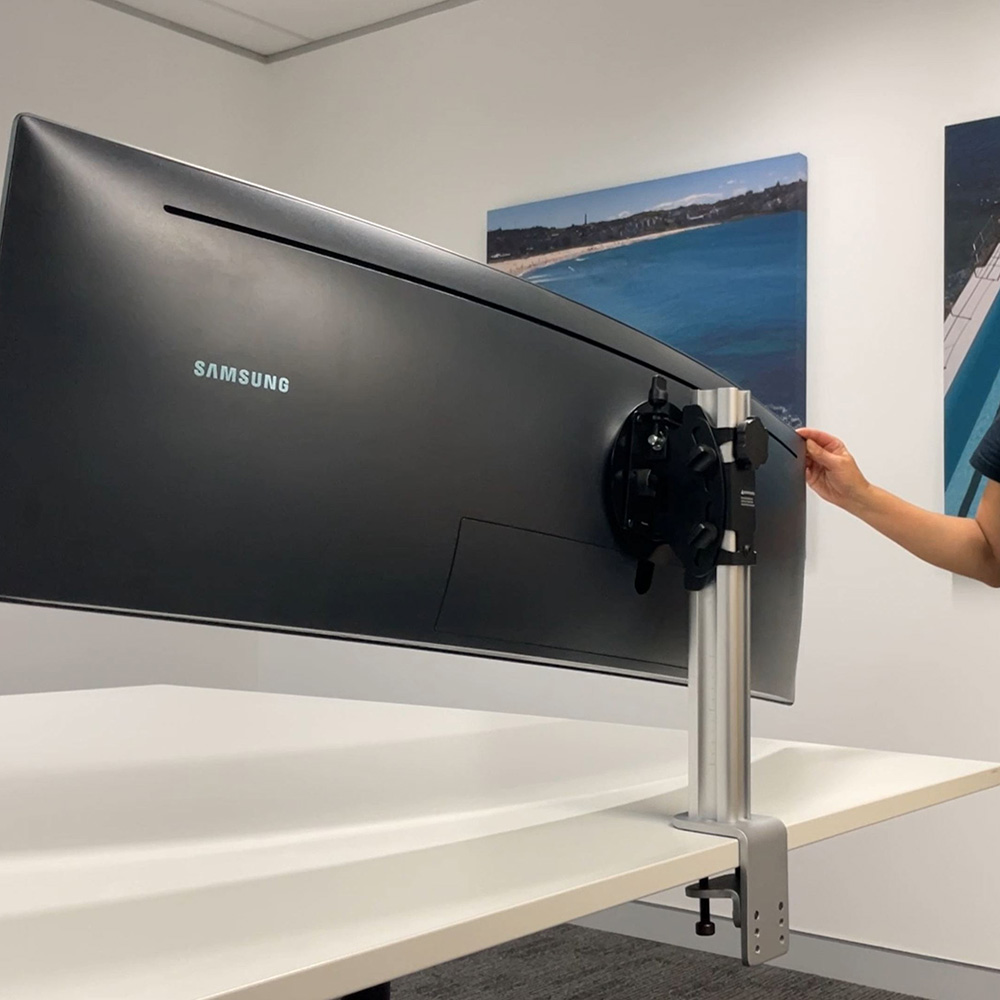
Glide the bracket onto the post, with the inside guide slotting neatly into the rear channel of the post. If the bracket guide is correctly inserted to the rear post channel, it feels secure and not loose around the post.
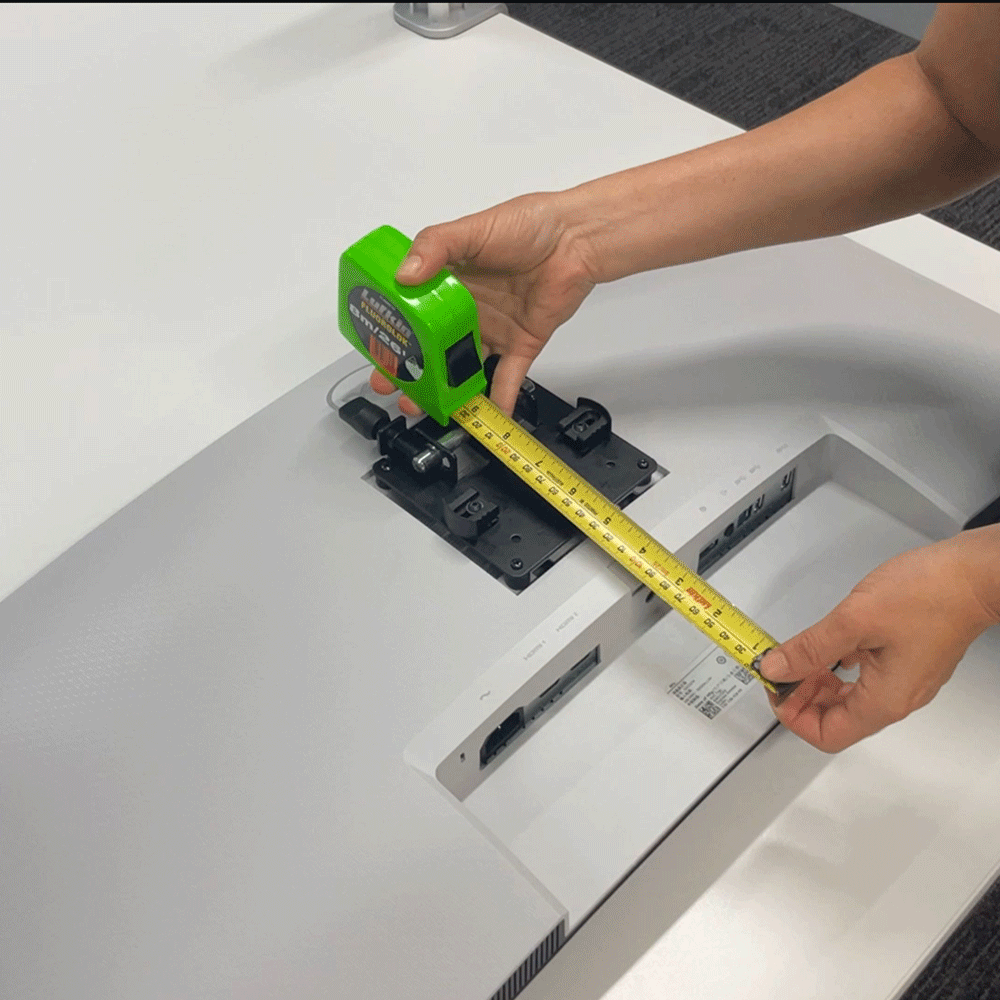
Measure your monitor height and position the bracket at a comfortable position on the post to provide your monitor clearance above the desk.
Some ultrawide monitors require a VESA adaptor, which is typically included with the monitor. Consult your monitor’s instruction manual for details.
Your Atdec bracket comes with spacers and longer screws for monitors with recessed VESA surfaces, and shorter screws for those with flat or protruding VESA surfaces.
Your Atdec bracket comes with spacers and longer screws for monitors with recessed VESA surfaces, and shorter screws for those with flat or protruding VESA surfaces.
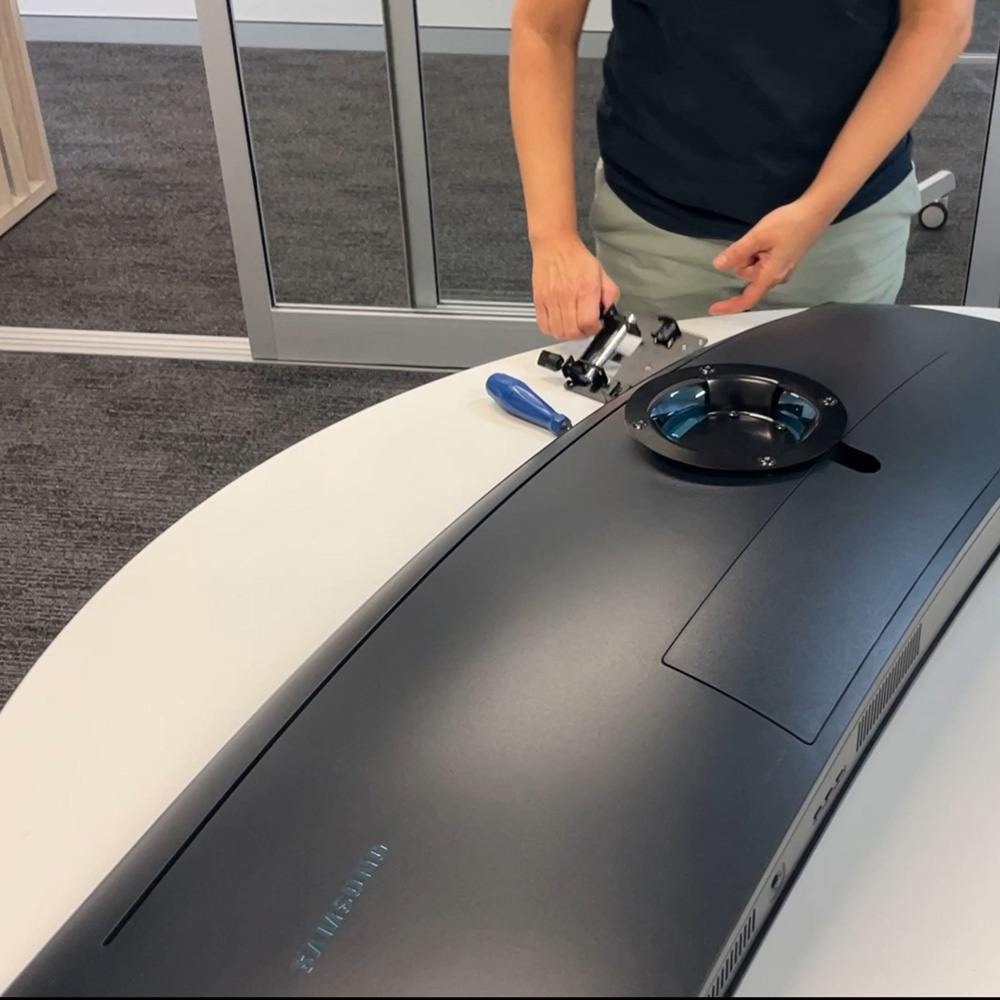
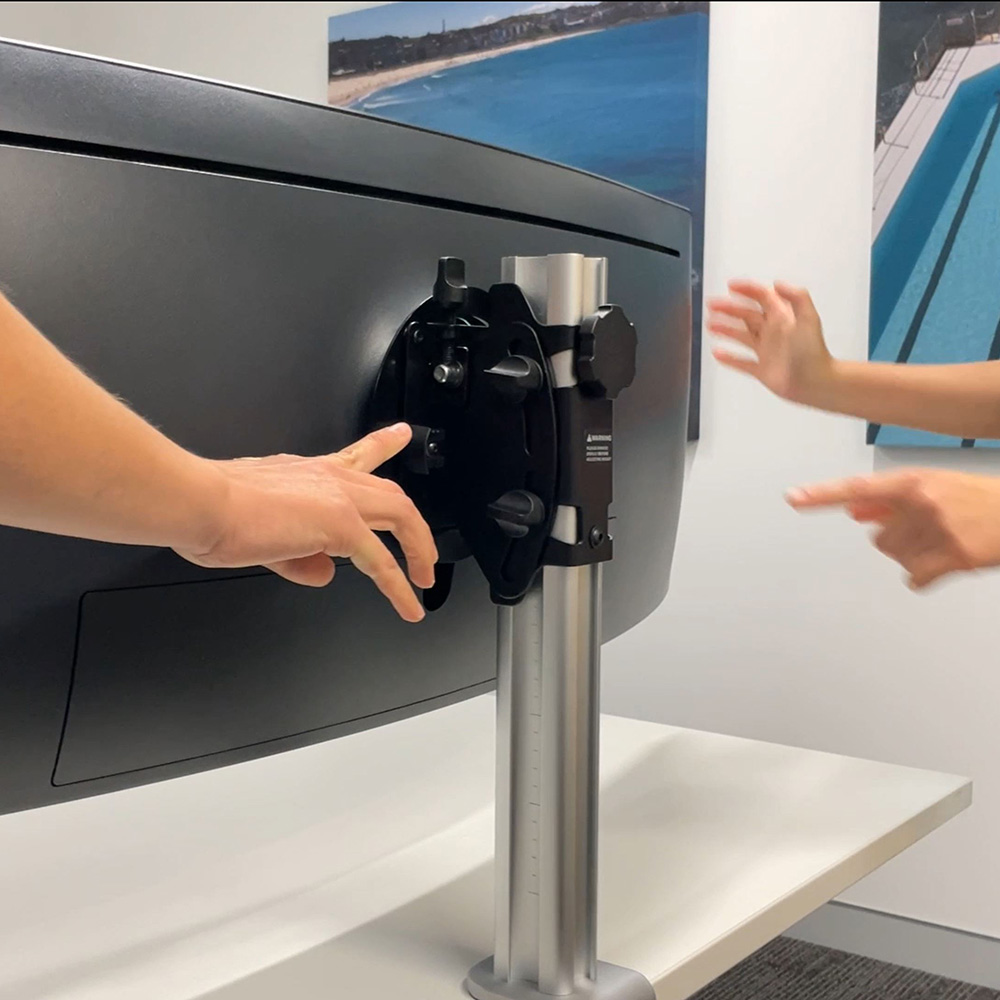
It is recommended that you get assistance from another person to lift your monitor and slide the VESA adaptor into the saddle. After hanging your monitor, push the two side tabs in.
Movement of the display is expected if a load is applied to the corner. You should avoid putting a load on the corners of your display/s.
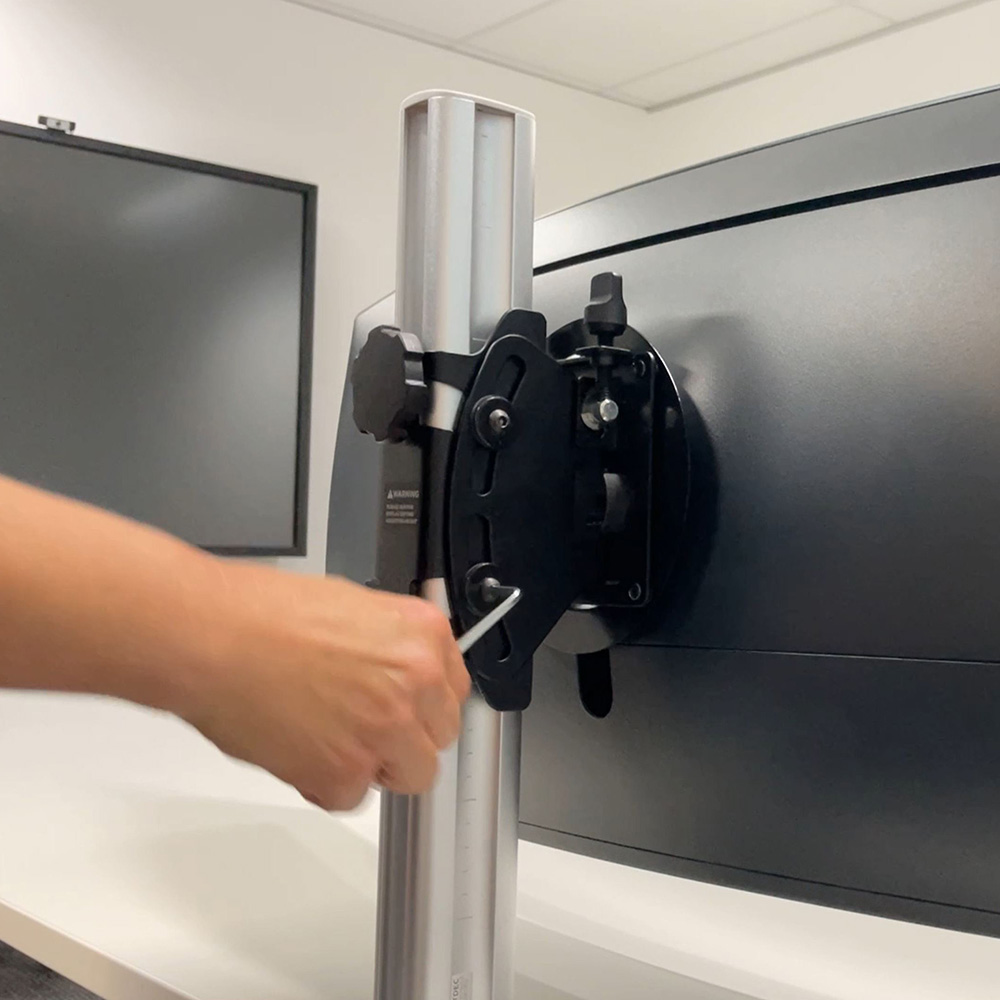
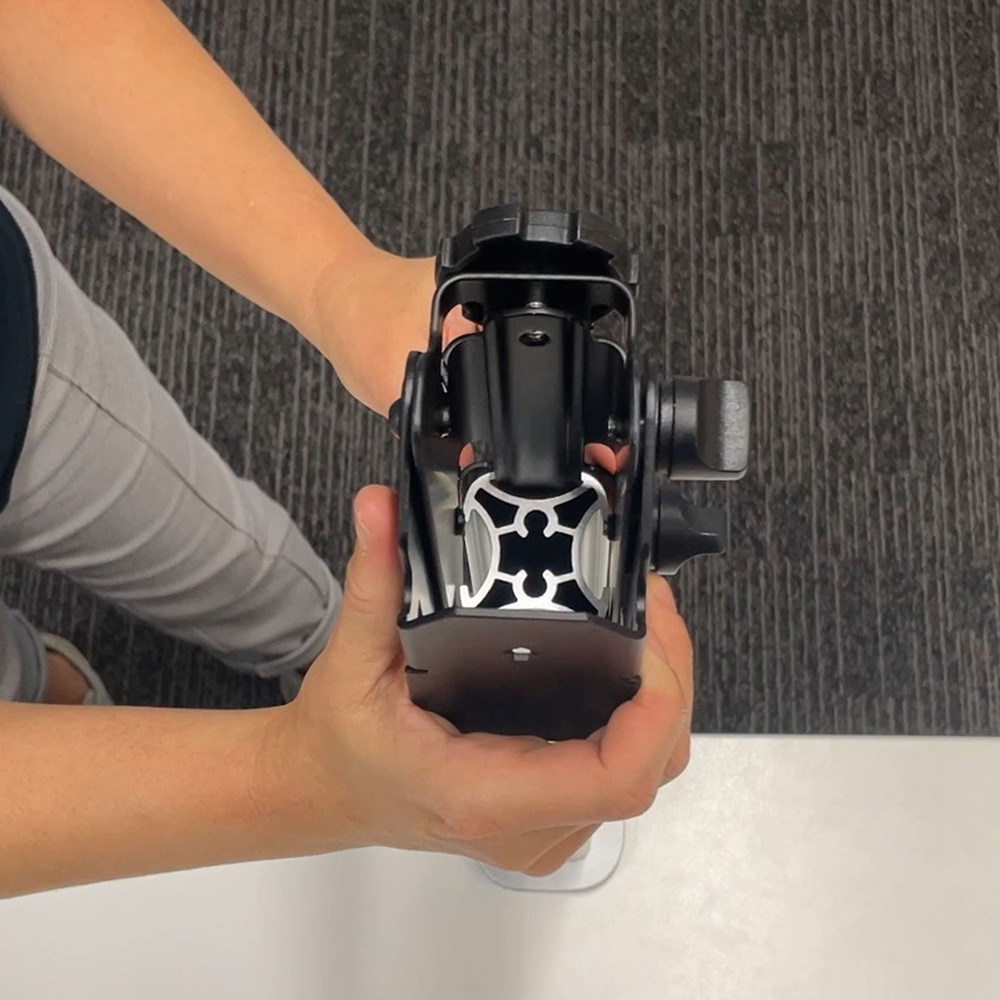
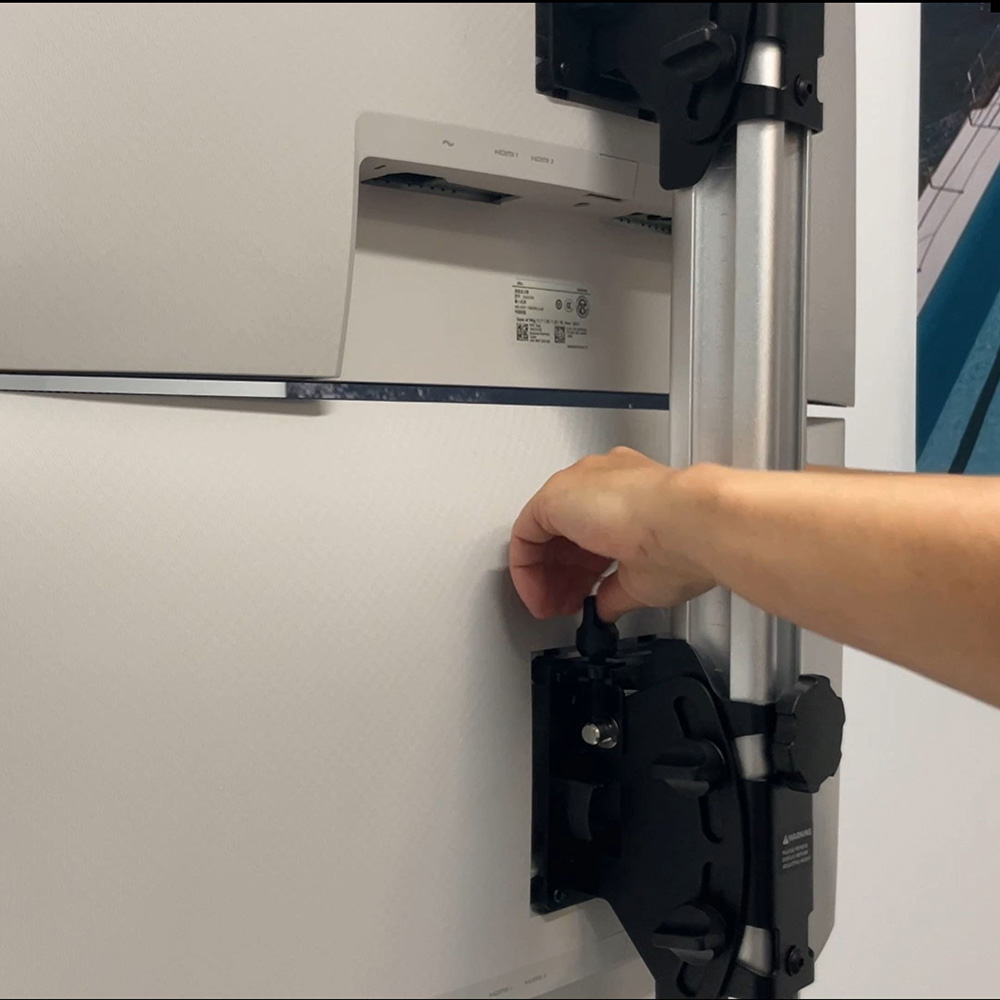
The tilt knobs on the left side of the bracket (when looked at from rear) are used to loosen the tilt mechanism. If the tilt knobs do not loosen sufficiently for your monitor to tilt, the tension is set too high. Use the hex key provided with your bracket to loosen the tensions screws shown in this image. Loosen top and bottom screws a quarter turn at a time, clockwise, until you achieve the desired tension. Then position your monitor and tighten only the tilt knobs.
The reverse can be done if your tilt mechanism needs more tension.
The reverse can be done if your tilt mechanism needs more tension.
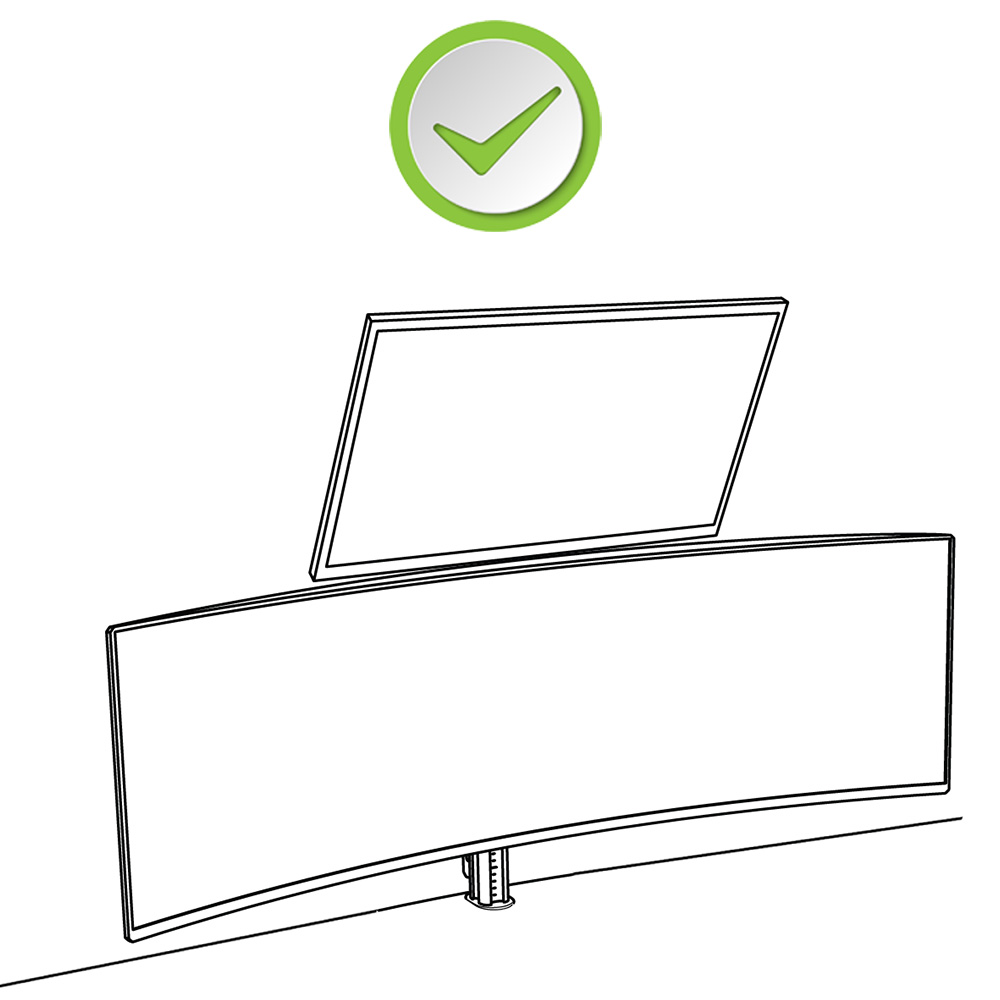
If mounting a second display, ensure the top bracket is positioned with enough space for the top monitor to clear the lower monitor. We recommend you plan for 12mm or ½” gap.
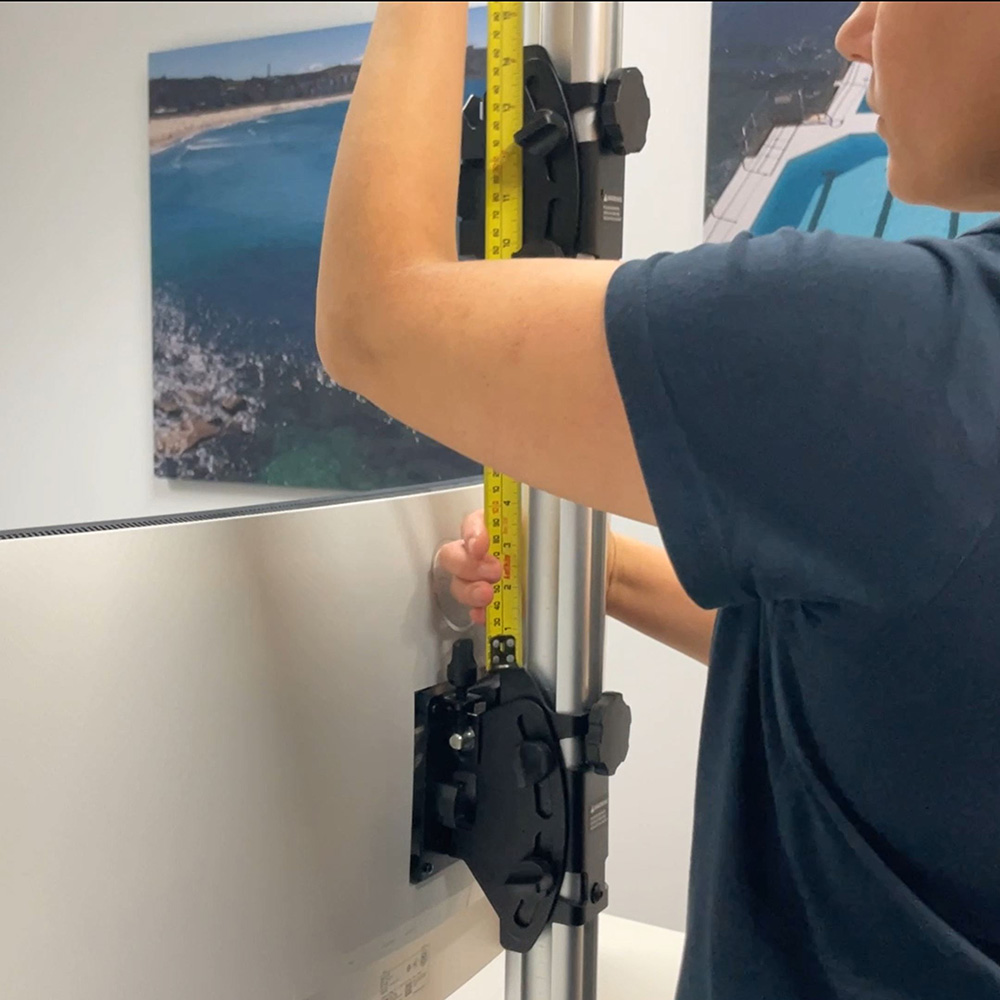
Use the fine tune adjustment knobs to ensure your monitor is level and to close the gap with two-monitor setups.
Long service life & 10-year warranty
Atdec products are designed for long service life – generally longer than monitors. So, it is likely that you will put multiple monitors and setups on your mount. Please reread the Installation Guide before adjusting or changing your monitors, and keep these key points top of mind.
Different sized monitors are okay
- If you have vertically stacked monitors
- Top and bottom monitors can be different size & model
- Adjust tilt to compensate for varied monitor depths
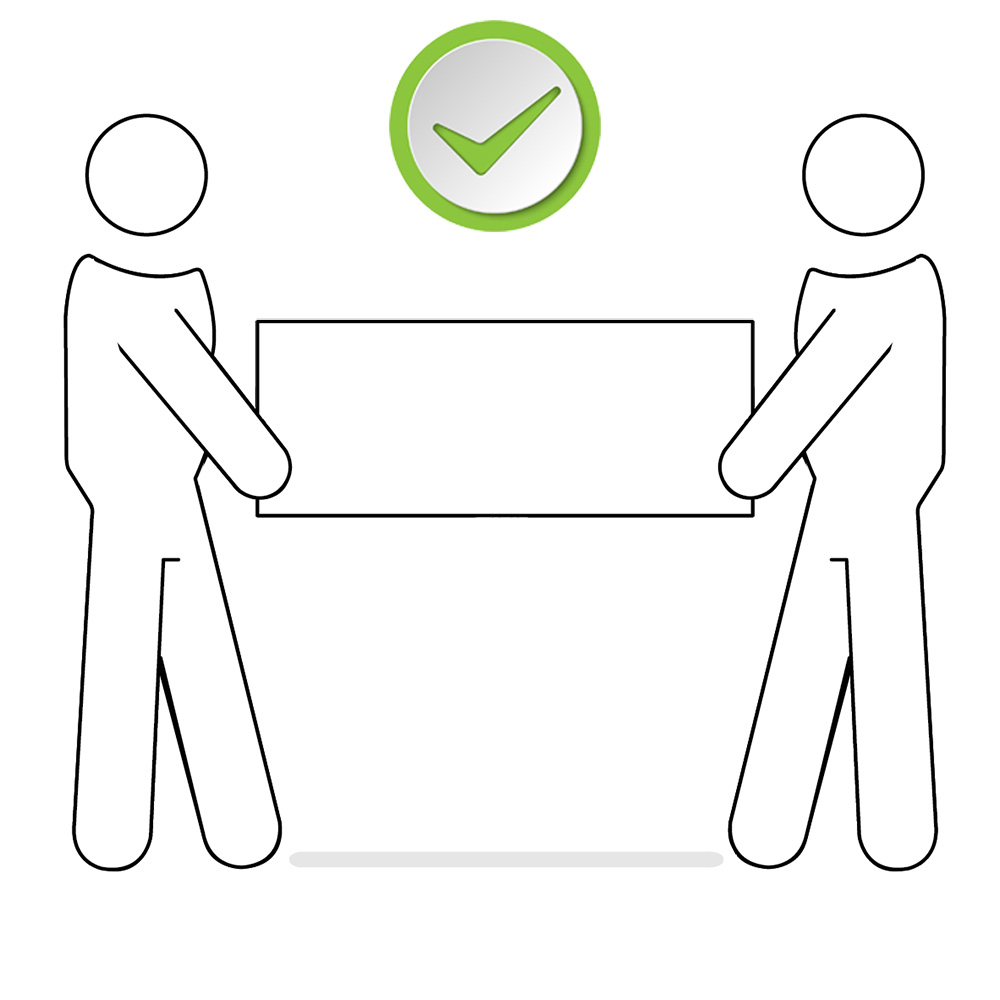
A two-person job
- Get help to attach and remove monitor/s
- Don’t risk your expensive ultrawide display/s
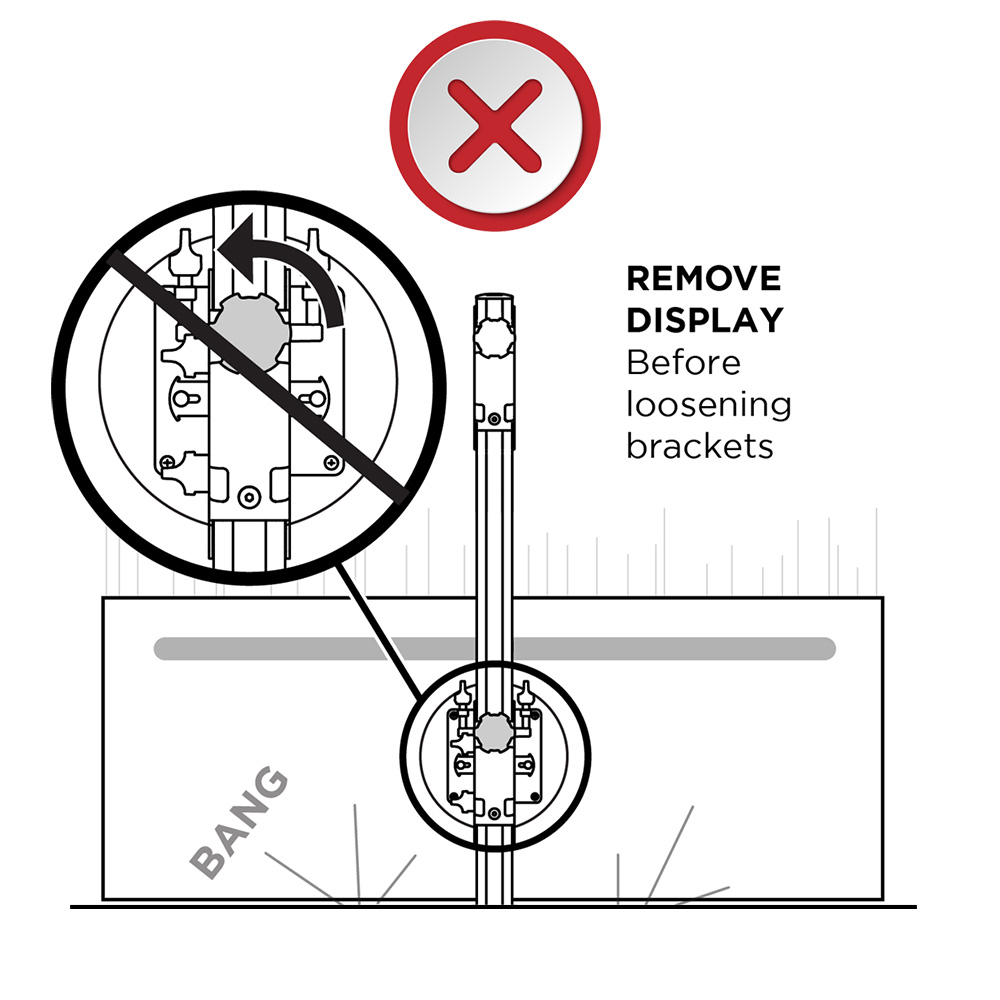
Remove monitor to adjust bracket
- Remove monitor before loosening bracket with hand knob
- (Fine-tune adjustment knobs and tilt knobs are designed to use with display attached to bracket/mount)
Ready to learn more about our partner network?
We value our partner network highly and treat them like VIPs! Talk to us about opportunities to join and find out why Atdec partners are so satisfied.

Talk to us about your next project